Showing posts with label Vegetarian Accompaniments. Show all posts

Pom Cukes Salad

Its 10th of the month and time for Muslim Food Bloggers Challenge. I know I am writing up the post pretty at the last moment.. but was totally caught up in a new project I ve taken up.. hopefully in sha allah it works out successfully .. So whats the topic for this months Challenge? POMEGRANATE .. yes.. the little jewels adorn the topic. Today its a simple and easy to make salad i am posting using pomegranate.. and with this post there is a new template I would like to bring to the blog.


Of lately if you have been following my instagram and facebook I  am putting up one page recipes... simple and easy to make and its one page. and in sha allah i am planning to post all the one page recipes posted there in the blog one by one and to begin  I am starting with this beautiful and simple salad.

For the past two months I am packing salads for my hubby's lunch box along with boiled eggs and sometimes grilled chicken.  its no diet.. viet.. he finds it easy to eat in his busy schedule and salads neednot be hot na.. Slowly I also started to have these salad meals.. and we both found it to filling and not feel hungry for nearly 3-4 hrs.  Making salad 5 times a week you have to don your thinking cap to keep up the enthu of eating salads..


basically I add cucumbers and lettuce either the regular / romaine / Iceberg and change the veggies with mini tomatoes, salad bell peppers, mini radishes, carrots, sometimes i try to add fruits like grapes, apples, oranges and toasted nuts.. actually raisins add beautiful sweet touch to the salad. The salad dressing is cayenne pepper/ sumac/ chaat masala/ salad seasoning..  and at last add a handful of chickpeas or rajma .


sorry to have bored you with a long list.. the salad I am posting is so versatile you can mix and match with any of the above. so lets get to todays salad... MFBC is Pom Cuke Salad. I wanted to highlight the pomegranate in this salad.. so didnt add many ingredients and kept the salad dressing simple and fresh..the heat from cayenne pepper, the cool cukes, sweet and slightly sour pomegranate makes it a perfect combo
Serve it with soft boiled eggs or with grilled chicken or fish it makes a complete meal.. so lets head to the recipe.




The Versatile Green Chutney

At last found time for blogging... When the laptop is free in my home I am busy with work.. When I am free the laptop is occupied... I know its nearly more than three months since I posted.  but meanwhile have been working  on many recipes..  hope to post them soon in sha allah. Today's recipe is the versatile Green Chutney....  It used in sandwiches, chaats , as spreads etc.,etc.,
    I love green chutney... for its spiciness ...for its vibrant color... have attempted to make them at home innumerable times.. but have not achieved the perfect chutney.. sometimes the balance of flavor misses or sometimes the vibrant green color misses.. I can never use them the next day coz I have always felt a bitter taste in my chutney...At one point I have stopped trying it out...
    Recently there was a no-fire cooking class in my son's school... they made sandwich. My son wanted green chutney.. I was quite confused. Then asked help from my dear friend. She told me the recipe which was very easy to prepare and was super yumm too. such a vibrant color n it stays fresh for 2-3 days... storing them in a airtight container... with the arrival of winter  n fresh greens available all around Qatar.. I am preparing it every week..  so lets proceed with the recipe..


You Need:

 Coriander leaves                        a big bunch
Garlic cloves                               4 nos
Green chili                                  3-4 nos
Tomato ( medium)                      1/2 nos
Lemon juice                                1/4- 1/2 cup
Salt

Preparation:

Clean and wash the coriander leaves .. chop them coarsely
In the blender add the coriander leaves, garlic pods, green chilli , tomato, salt  and around 1/4 cup lemon juice first  , and little water and grind
Check for lemon n salt n add if needed...
Transfer to a clean container n store in the fridge .
Now you can use them in chaats, sandwich , rolls. etc

NOTES:
1) I have used the stem of the coriander leaves too.
2) This chutney is quite spicy .. you can always adjust the amount of green chili used according to your taste.
3) lemon juice plays important role in keeping it fresh n retain colour...  Add enough so as not to have the bitterness.
4) this recipe yields around 2 cups of chutney


Salata Hara - Middle Eastern Chutney

Salata Hara ia s a famous Middle Eastern Chutney... Spicy with a hint of sourness... They are served with all Rice n Meat dishes such as Mandi, majboos, Buhkari rice..... Arabic Rice dishes are full of flavour but quite bland unlike our spicy biryani.... This Salata Hara adds the spicy twist to it...
Very simple to make and it goes well as an accompaniment to our Indian dishes as well....
       Learnt this recipe from a friend of mine who is more like a sister to me... Her version is much flavourful... compared to what i used to make before...  The ones the restaurants serve is more of a puree but i like it little chunky.. to add texture.... I make them in my small chopper.... making them in food processor will also turn good.. If you are making them in your chutney jar... Operate them in pulse mode to maintain the texture.  This recipe calls for 2 chilli... if you  like it more spicy you can add another.


You need:

Tomato( medium)                       2 nos*
Onion (small)                             1/2 nos
Green Chilli                                2-3 nos
Coriander leaves                         a small handfull
Lemon Juice                               1/2- 3/4 tsp
Ginger                                        1/2" piece
Garlic                                          1 clove**
Salt

Preparation:

Roughly chop the onion, tomato, green chilli , coriander leaves, ginger , garlic
In your chopper add the ginger garlic onion n green  chilli and grind them for about 30 seconds..
Now add the tomato n coriander leaves  n grind them for 30 seconds - 1 min... depending on how you want them chunky or coarse chutney.
Add 1/2 - 3/4 tsp of lemon juice ( always add little n check for taste then if needed only add more) and salt. give a quick mix n Serve.
You can also store them in airtight container n keeps fresh for 2-3 days

Note:
*The tomato used should be ripe
** I ve used a big clove of garlic... if the garlic pod is small use 2 nos

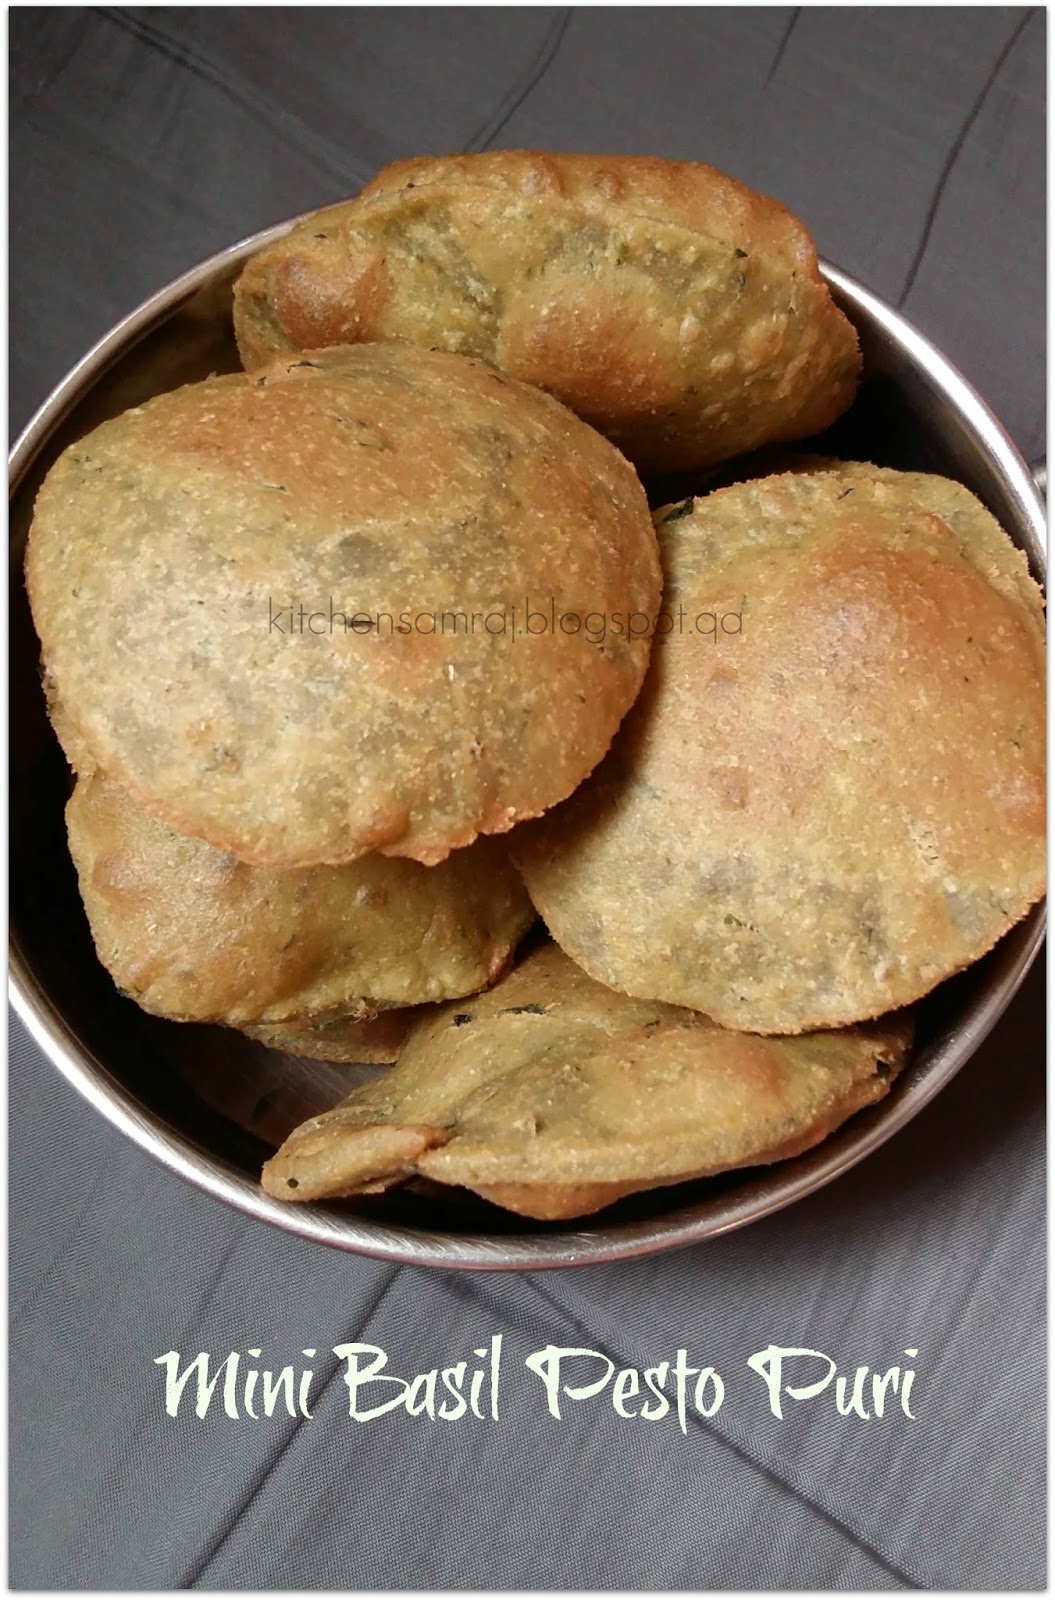
Mini Basil Pesto Puri

After a long time participated in Shhhhhh cooking secretly challenge and this month my partner is Mayuri Patel of
Mayurisjikoni and she gave me two interesting ingredients Basil and lemon.
I chose basil as that's one ingredient I have not worked with but then thought how to mask them checked out so many recipes for inspiration but couldn't land on any.
The one recipe that came across was basil pesto and thought how to mask it as it is used in either pasta or as spreads.  Then all of a sudden thought why not make chapati then started the prep  and made pesto recipe from here.
Made only little quantity about 1 1/2 tbsp
And started making the dough. Then my mind changed and thought of making mini puri because I wanted my kids to eat
Voila then made mini puri which was devoured within minutes and I am excited because till now the secret ingredient had not been guessed correctly  by my fellow friends.
***my card reader not working currently so basil pesto photo is stuck there. will post it as soon as it gets fixed***
Let's proceed in making this mini basil pesto puris


You need:

For pesto:
Basil leaves.          1/3 cup
Walnut                   3 pieces(toasted)
Garlic clove.           1/4 of a clove
Olive oil.                  1 1/2 tbsp
Salt

For puri :
Atta flour.               1/2 cup
Basil pesto.             1 1/2 tbsp
Water
Oil for frying


Preparation:
Grind all the ingredients given under for pesto to a fine paste.
In a bowl add the flour and pesto and enough water to make a dough.
Rest them for 10 minutes
Roll them into a big circle. It should neither be thick nor very thin 
With a circle cutter cut them into small circles.  Use all the dough and cut out circles.
In a separate kadai heat the oil. Test whether the oil is heated enough by putting a small piece of dough in oil.
Keep the flame in moderate heat and fry the puris one by one . Press the puri in oil then only they will puff up. 
Remove them with slotted spoon
Serve them hot.  

Notes:
You can make them as regular sized puris too.
Suits best for kids lunch box. Allow them to cool a little before packing so that they don't turn soggy.

Bitter gourd Idli Mizhagai Podi

Bitter gourd....... idli podi.........hmmmmm  does that match together???  If I wasn't a blogger then I would have told what a weird combo, but not now. They both match very well. The idea came from watching a health program. She was mentioning about drying bitter gourd  and grinding it to a powder, it is good for diabetic people, Then I thought why not make some interesting dish using the technique,, brought bitter gourd and sliced them thinly and dried them till they were completely dry for about four days,
   Later ground them and got a fine powder,, success at first level, Then what to prepare????? was making Idli Mizhagai Podi  and then thought why not make idli podi with dried bitter gourd (  oopps forgot to take a snap) and it worked, The end result was simply delicious, spicy n less bitter. Has fenugreek and flax seed bringing them on the healthy side.  Bitter gourd being my favorite veggie, now I can have them all the time with my idli dosa yumm yumm.


You need:

Dried bitter gourd            1/4 cup
Chana Dal                       1/3 cup
Urad Dal                         1/2 cup
 Dry Red Chilli (long)       12 nos
Flax seed                         2 tbsp
Whole Asafoetida            3/4 tsp
Garlic                               3 cloves ( big)
Fenugreek                       1 tbsp
Curry leaves                     2 sprigs
Gingelly oil                       1-2 tbsp
Salt
Sesame Seed                   1 tbsp
Ajwain seed                     1/4 tsp


Preparation:

Heat a heavy bottomed kadai, add 1/2 tbsp oil and fry the chana dal in medium heat, till golden brown, remove them to a plate
Then add Urad Dal to the same pan and fry them till golden brown.Remove them to the plate.
Now add 1/2 tbsp oil and fry the bitter gourd, Remove to the plate.
Next add another 1/2 tbsp oil fry garlic and chilli, till the garlic turns golden. remove
Now add 1/2 tbsp oil fry the whole asafoetida till they turn crisp add the remaining ingredients and and fry for a minute or two. Remove them to the plate.
Add required salt , Let them cool. Grind them to fine or coarse powder according to your taste. Mix well so that all the ingredients mix evenly.
Tasty Idli podi is ready.

Note:

How to make dried Bitergourd:
 Slice bitter gourd thinly and and dry them in sun for 4-5 days. Store in air tight container.

Potato Fry

From kids to elders everyone likes potato fry, because its a super combo with any South Indian Meal. From Sambhar to rasam, lemon rice, curd rice etc ,etc. I love the potato fry made by my Aunt, she used to fry them in dosa tava and the tasteis always awesome everytime she makes, i have tried to replicate her recipe many times but could not achieve it. Thanks to my lovely sister who gave me this recipe which she learnt from her mother-in-law, It's super delicious, crisp on the outside and soft inside and tastes exactly the same my aunt makes. The trick which her mother-in-law told was to cover the kadai tight so that the steam cooks the vegetable in 10 minutes. I follow this rule for all my vegetables and voila not only I cook the vegies fast without losing the nutrients. Now moving forward to the recipe.


You need:

Potato(large)                            1  
Chilli powder                            1 tbsp
Salt
Oil                                          1 1/2tbsp
Water                                     1 tbsp

Preparation:

Peel the potatoes and cube them( about 1").
Take a flat pan add all the ingredients and mix well.
Keep the potatoes in a single layer so that each potato is fried uniformally.
Cover tight with a lid and Cook them in medium flame for 5 minutes first, then turn the potatoes over to fry the other side cover and cook for another 5 minutes. Check the potatoes, if it gives a little resistance then cook for 2-3 minutes more. Usually the potatoes cook in 10 minutes.
With a slotted spoon remove the potatoes, draining the oil in the pan.
Serve with your favorite dish

Note:
I always reuse the oil immediately by making scrambled eggs in the same pan, It not only adds taste to the eggs, there is no wastage too.  

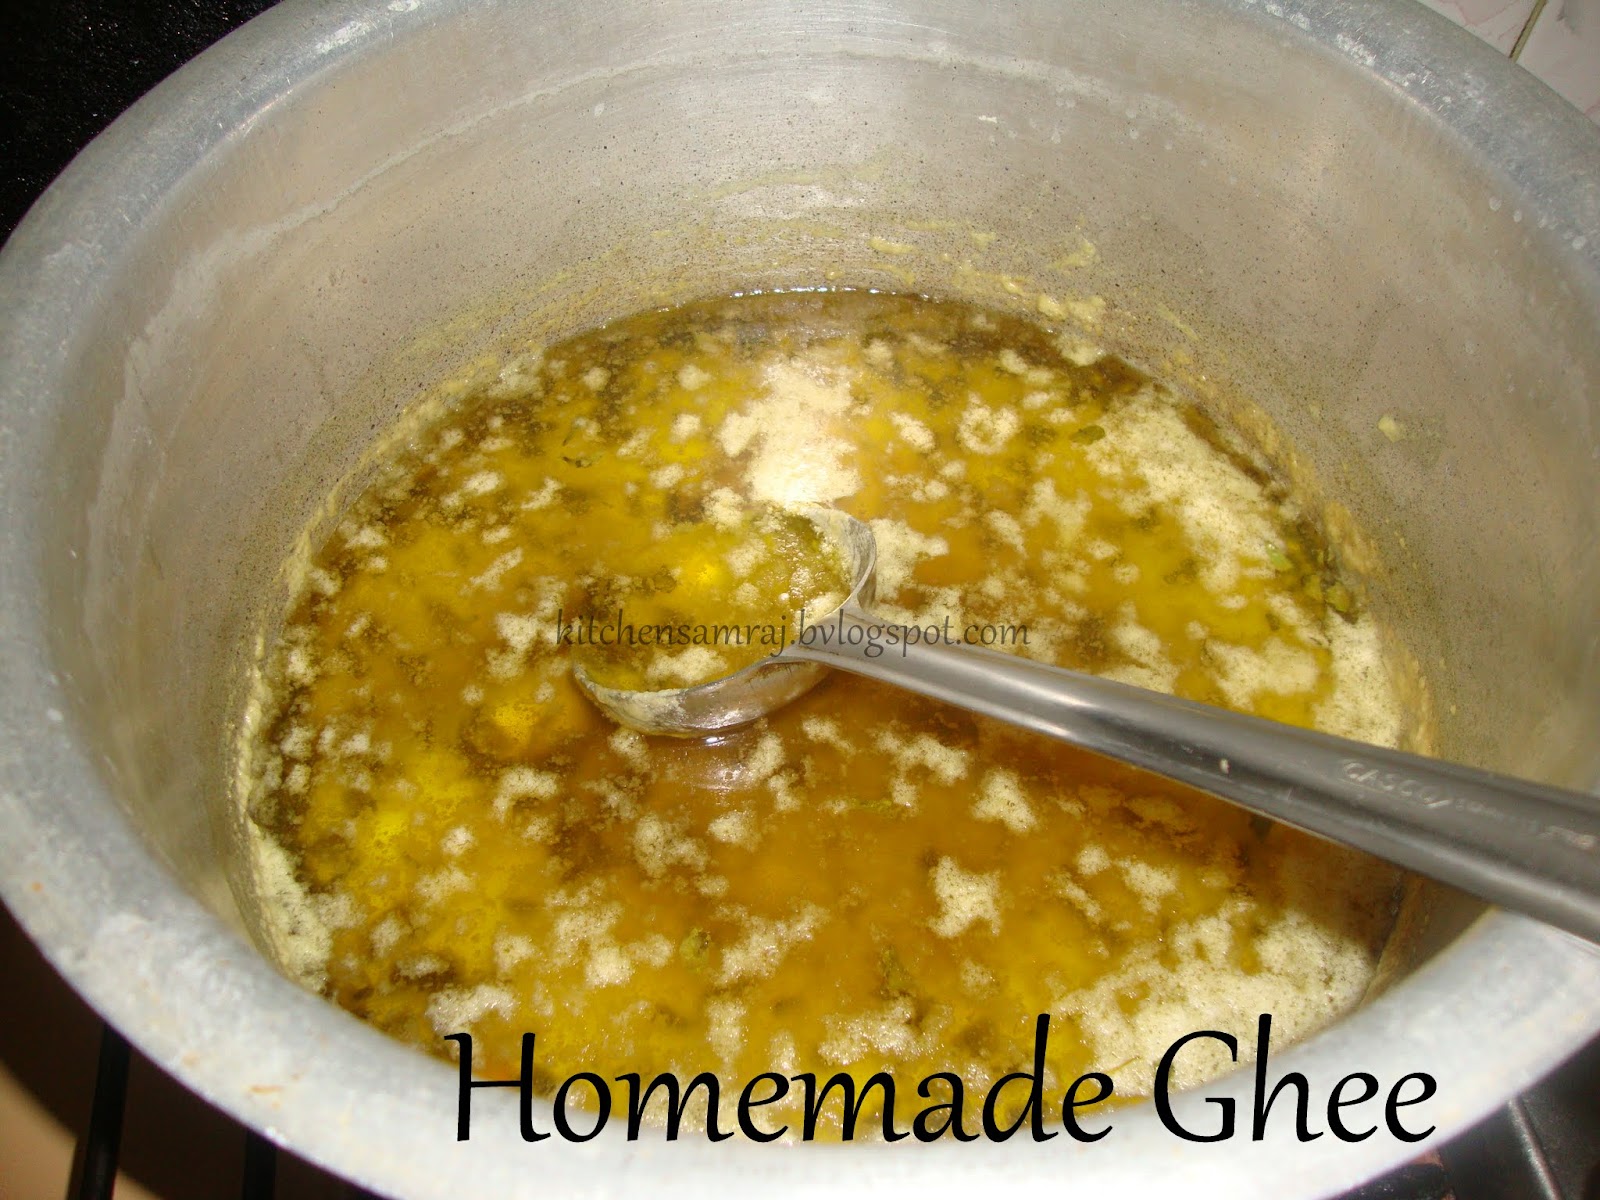
Homemade ghee

Even when I write this post I can feel the aroma of homemade ghee and the speciality of this ghee is it is made from the famous Uthukuli butter. When we went for vacation my hubby bought a kilo of butter directly from Uthukuli.
 The ghee made from this butter is very aromatic and has a nice golden yellow color rather than the butter available in Khadi craft store which gives a white colored ghee.
Ghee made from fresh butter is more aromatic than made from readily available butters.
 Making ghee at home is not a hard job at all all you need is butter preferably fresh, rock salt, drumstick leaves or curry leaves and buttermilk. After the ghee is made the residue in the vessel can be mixed with rice and eat or dip the dosai in the residue and eat, forget about the calories for that day !! So yummy. Now lets move ahead in making aromatic Uthukuli ghee


You need:

Fresh butter                500gms
Rock salt                     1 tsp
Drumstick leaves (or)
Curry leaves                1/2 cup
Buttermilk                   1/4 cup


Preparation:

Wash the butter with water to remove any impurities , if you are using store bought butter skip this step
Wash the leaves and soak them in buttermilk


Put the butter in a big thick bottomed Kadai. Keep the flame in medium heat
The butter will start to melt at first the butter will start to froth,


Within 15-20 minutes the froth will subside and you will be able to see a clear liquid and when the liquid turns golden color and you can see the bottom of the pan clearly
Now add salt and buttermilk mixture,


 the ghee will start to frizz out that is why you need a big vessel
When the ghee settles you can smell the beautiful aroma of freshly made ghee.


Remove from the stove and strain them in a metal strainer into a clean container.


Now the ghee will be in liquid state


 after 10-12 hours the ghee will solidify and you will get beautiful grainy and aromatic ghee.


Hummus & Garlic Dip

Hi friends! I know I suddenly vanished from the blogging world, my laptop was not working n had no way to post all the delicasies I made last week, borrowed my friends laptop, so would be posting recipes in clusters. This post was to be posted on Friday were I made a full fledged Arabic Dinner last thursday. With no further delay Iam going to the post, Hummus n Garlic dip. Regarding hummus I know I neednt give much intro, its a famous spread made from chickpeas n sesame paste.
By the name Garlic dip or Garlic paste as everyone would call here is a simple dip made from egg white n garlic. Once you taste this you will surely fall in love with them. Garlic dip is a must serve accompaniment with Roasted Chicken but you can have them with dosa, idly, chappati, parotta or just spread them over bread n have them plain or toasted it tastes marvellous. 
Sending Hummus and Garlic Dip  to AWED- KSA guest hosted here event by DK and Hummus to 
CWS: LB: Chickpeas guest hosted by Nithu event by Kiran

HUMMUS:


You need:

Chick peas                       1/2cup
Tahina                               2-3tbsp
Garlic                                2cloves
Lemon juice                       1tbsp
Salt

Preparation:
Wash n soak the chick peas over night n coook them till soft, Alternatively you can use canned chick peas too.
Blend the cooked chick peas, garlic, tahina, lemon juice n salt to a smooth paste by adding enough water.
Do check the sourness of the lemon, if you feel you need a little more you can add them. I always make my hummus a little thinner, making them thicker or thinner is up to your preferance.
Serve them with olive oil.

GARLIC DIP:


You need:

Egg white                       2nos
Garlic clove                    1nos
Oil                                  1/2cup
Lemon juice                    1/2-1tbsp
Salt

Preparation:

You can make them in your mixe grinder or if you have a powerful food processor you can make them in that too.
I used the chutney jar for making them. 
First grind the garlic clove by pulsing them for 30 seconds. Add the egg white n beat them in high speed for 2 minutes. Now the mixture would have turned white,
Now add the oil and beat them again for 2 minutes in high speed. Now the mixture would have turned thick
Add enough lemon juice depending upon the sourness and salt n run them for 30 seconds.
You can serve them immediately where the garlic's hotness will be high. If you dislike the pungent smell make them about 4-5 hours before hand. It would be perfect.
This dip would stay  fresh in the fridge for 3-4days. Use your imagination n have this dip with tandoor or as mentioned earlier or use them as a simple spread in sandwhiches n Rolls


Note:

If you find that the dip is not thickening add mayonise or boiled potato to add fullness to it

MW Tomato Chutney

Though Cooking in Microwave is easy n fast my family is not a great fan of Microwave cooking. If there is is a dish that my family would relish making in the MW it would be Tomato Chutney. Somewhat it is more tastier n creamy than the regular Chutney n the plus point is that you neednt stand n fry those onions n tomatoes n there is no fear of the vegetables being charred. In this MW version the vegetables get cooked evenly, n there is no fear of them getting charred unless you overcook them in MW.
Sending our favorite chutney to MEC- Favorites guest hosted by PJ event by  Srivalli and to
365 Days of Microwave Cooking event by Srivalli


You need:
Onion                                  1nos( roughly chopped)
Tomato                                2nos(roughly chopped)
Dry Red Chilli                      2-3nos
Jeera                                   1/2tsp
Oil                                      1tsp
Salt
Roasted Gram  Flour      1/4cup


To Temper:
Oil                                   1tsp
Mustard Seed                  1/2tsp

Preparation:


In a MW safe bowl add the oil, jeera n MW for 2 minutes.
To that add the onion, tomato n Dry red chilli n MW for 4 minutes.
Cool n grind them fine with salt n Roasted gram flour n very litttle water.
In a small MW bowl, Add the oil n mustard seeds n MW for 1 1/2 minute.
Serve with Idly or Dosai

Friends do send in your entries to Soccer Mania by July 17th.

Cauliflower Stalks n Carrot Pachidi

Pachidi is either sweet or sweet n sour. It is can be had as an accompaniment to biryanis, Pualo etc.,
Pachidi is made with a vareity of vegetables n fruits. Today I made this pachidi with cauliflower stalks n Carrot. It turned out absolutely delicious n was perfect with the Pulao n Mutton gravy. I used Vinegar instead of tamarind extract to get a lighter coloured pachidi. N if you dont have Dates you can jaggery for sweetness too.
Sending this pachidi to Nithu's Best out of waste n to Vegetable Marathon - Carrot guest hosted by PJ event by Anitha


You need:
Cauliflower stalks                 1/4cup( chopped)
Carrots                                 1/4cup(chopped)
Onion                                   1/4cup(chopped)
Tomato                                1/2 nos(chopped)
Ginger Garlic Paste               1tsp
Mustard seeds                      1/4tsp
Fenugreek seeds                   3-4nos
Chilli powder                        1/2tsp
Turmeric powder                  1/4tsp
Jeera powder                       1/4tsp
Coriander powder                1/4tsp
Pepper powder                     1/4tsp
Vinegar                                 2tbsp
Dates                                    3-4 nos( chopped)
Salt
Oil                                        1tbsp

Preparation:

Heat oil and mustard seeds, n fenugreek. add the onions, cauliflower stalks, carrot  n fry for 2-3 minutes. add the ginger garlic paste n fry for a minute.
Add the tomatoes n fry till they turn soft.
Add  all the masala, vinegar, salt, dates, 1/2cup  water, n cook till the water has evaporated n the vegetables are cooked.

Serve hot!

Carrot Dosai with Broccoli Stalks Chutney

Making our children eat veg is quite a hard task, You really have to make them invisible to make them eat. One such recipe is Carrot Dosai. It is very simple to make n the kids will surely gobble them without knowing that there are carrots in them, another is my Broccoli stalks Chutney. What a could be a better way to use the broccoli stalks that we usually throw away. Made Chutney from it and to tell the truth nobody guessed that the chutney was made from broccoli stalks. It really tasted good. Real thanks to Nithu to have brought out our imaginations.

Sending the Carrot Dosai to Vegetable Marathon- Carrot guest hosted by PJ event by Silpa
Sending the Chutney to Nithu's Best out of Waste


Carrot Dosai:

You need:
Dosai Batter                    2 1/2cups( fermented)
Carrot                            1cup( Shredded)
Coriander leaves            a handful( finely chopped)
Salt
Oil

Preparation:
Mix the carrot, coriander leaves, salt to the Dosai Batter.
Heat the tawa, pour a laddleful of batter n Spread to a thin round. Drizzle oil on the sides.
Cook on both sides n Serve Hot

Broccoli Stalks Chutney:


You need:
Broccoli stalks                         3/4cup( chopped)
Onion                                      1/2nos
Coconut(shredded)                  2 1/2 tbsp
Coriander Leaves                     2tbsp
Roasted Chana Dal                  2tbsp
Urad dhal                                 2tbsp
Jeera seeds                              1tspw
Peppercorns                             1/2tsp
Green Chilli                              1-2nos
Dry Red Chilli                          2-3nos
Ginger                                      1" piece
Tamarind                                  1 very small piece
Salt
Oil                                           1tbsp

To Temper:

Oil                                         1tsp
Mustard seeds                       1/2tsp
Dry Red Chilli                        2nos

Preparation:
Heat the kadai, add oil, jeera , pepper n fry for 30 seconds, add the urad dhal n fry till they are golden brown,  add th onions, broccoli stalks, coconut, Coriander leaves,Roasted chana dhal, tamarind, green n red chilli, tamarind, Ginger , salt n fry for 10 minutes, the stalks should have cooked, .
Cool n grind them to a smooth paste. Add enough water to make them chutney consistency.
Temper n add them to the chutney.

Serve them with tiffin of your choice

Also sending Carrot Halwa to Vegetable Marathon- Carrots

Onion n Lemon Sambal

Once again Posting a vareity of Sambal. This is spicy, sour n perfect accompaniment for all dishes. It just needs onions, preserved lemon, coriander stalks, gravy n green chilli. Yes, gravy chicken, mutton, dhal gravies would absolutely suit this. Ive used Muttai Paruppu Kuzhambu to make this sambal. Another star ingredient here is the coriander stalks, which we usually throw away. It adds an additional taste to the gravy.
The preserved lemon adds the sourness to the sambal. Sending this to Healing Foods Onion guest hosted by Priya event by Siri n to Nithu's Best out of waste


You Need:
Onion( finely chopped)                  1/2cup
Green chilli(finely chopped)            1nos
Preserved lemon                            2-3pieces
Gravy
Salt
Coriander stalks                            1/4cup


Preparation:
Mash the preserved lemon with onions, green chillies, coriander stalk n salt. Add enough gravy, if you want more sourness add an extra preserved lemon.
Serve

Aliyar Sambal/ Spicy Onion Sambal


Onions play a vital role in our cooking. It has many medicinal values too. You still can cook a few dishes skipping onions, but there are few dishes in which you cannot omit them at all. When I had to cook without onions for two months I found that there are few dishes which cannot be made without them. So I have chosen 5 recipes like that n would be sending it to event guest hosted by Priya.
Coming to this recipe it is very easy sambal to make.  I learnt this recipe from my grandmother, it's very tasty, spicy n very easy to make. Aliyar Sambal is my favourite n would just have it Plain rice n boiled egg. This sambal is the perfect accompaniment to any bland dishes like curd rice, paruppu kuzhambu, rasam, Chinese fried rice, etc. This sambal can even be stored in the fridge for 3-4 days. Use good quality thick soy sauce to enjoy the taste in maxima.
Sending this sambal to Healing foods- Onion guest hosted by Priya event by Siri

** Updating the recipe with new picšŸ˜


Aliyar Sambal / Spicy Onion Sambal


You need:
Onions( chopped)              1/2cup
Dry Red Chillies                 2-3nos
Oil                                      1tsp
Thick Soy Sauce              
Salt

Preparation:
Fry the red chilli in 1 tsp oil n crush them with the chopped onions n salt.
Add enough soy sauce to mix with.
Let the onions soak in soy sauce for an hour( the longer the tastier)
Serve them with yourt favorite dish